
Ferns are often used as strategic planting – to enhance a border or corner of the yard that needs a touch of grace. True enthusiasts think bigger, though, and choose to make ferns the centerpiece of a dedicated part of their plot. The peak of this principle is the fernery – a garden devoted to ferns, and designed specifically to showcase their unique beauty.
There are several important steps in successfully designing a fern garden, and it’s worth spending some time to plan each stage before you begin. In this article, we will cover all the important issues in detail so that nothing is overlooked, and you set yourself up for success.
Table of contents
- Survey the plot
- Seek inspiration
- Decide on the overall style
- Decide on the hard landscaping
- Design the plot
- Prepare the ground
- Select your ferns
- Finishing touches
1. Survey the plot
The first step is to identify a promising part of the yard that could be used as a fern garden. Most varieties of fern thrive in partial shade, in moist but not waterlogged soil, and with a good mulch of organic material. Some of those factors can be changed, but others are fixed constraints.
Physical constraints
The first major constraint is the physical environment. How big is the plot? Are there any services – electrical, gas, oil, or water – that cut across it? Do you have existing fences or walls that cannot be moved? Does the plot slope, or is it prone to waterlogging or drought? What is the soil condition, and will it need to be improved?
All of these questions should be asked. Most of the issues can be compensated for, worked around – or even better, worked with – but all of these constraints need to be identified and worked into your plans from the beginning.
It’s important to understand the physical constraints of the canvas that you will be creating upon.
Sun exposure
The other big factor that cannot be easily controlled is the sun exposure of the site. If you find a shady corner, under trees or in the shadow of a wall or building, that is a good start, but it is worth taking some time to actually track the passage of the sun over the day – and even over the year.
The sun coverage of a plot can change dramatically over the course of the day, and it may not be obvious that the perfect dabbled shade of the afternoon is counteracted by unforgiving full sun in the morning. The best way to be certain is to record the passage of the sun across the plot over the course of a sunny day.
This is the most complete way to answer the question, but even finding the direction of North and then figuring out the broad regions of the plot that receive morning, noon and afternoon sun, is a big advantage for later design. You don’t want precious ferns to suffer sun damage, because you overlooked the change in light levels across the day.
The shade of a plot can be manipulated in principle by planting trees, bushes or climbers, or by constructing porches, gazebos or trellis that cast a shadow. It’s worth identifying this at the very beginning though, so you know what you are letting yourself in for when it comes to the construction of the final design.
Climate
The most reliable way of ensuring ferns thrive in your yard is to plant varieties that are found naturally in your hardiness zone. That does limit choice, though, and so it’s good to know in advance which unusual, exotic or foreign ferns can survive and thrive in your region.
All good nurseries and garden centers should provide information about the hardiness of a particular fern. The hardiness zones can be found here, and so you can match any variety to your climate.
The big issues are very hot summers, and very cold winters. In most temperate zones, the majority of ferns will grow well. Many tropical varieties can also thrive in high temperatures, as long as they are shaded and well watered. But many popular varieties simply cannot survive freezing temperatures without protection.
There will be plenty of options open to you in fern selection regardless, but your local climate will set the “palette” of plants from which you can choose.
2. Seek inspiration
Next is a fun stage. Look around at ferns in gardens and nature and seek inspiration for your own plot. There’s nothing like admiring how other gardeners have used ferns effectively to get the creative juices flowing.
Online
An obvious starting point for inspiration is images and videos online. Sites like Pinterest and Youtube can be rich reserves of ideas. Scour gardening blogs and botanical garden sites for information and design ideas. A simple Google image search will start you on a winding path through innumerable fern gardens.
It’s worth taking some time to immerse yourself in the range of styles and contexts that ferns can be used in. Ferns can enhance both modern and classic gardens.
During this phase, it is also good to search on local nursery and garden center sites, to both assess the range of ferns available in your area, and to get more ideas about how varieties could be used together.
Garden visits
Online inspiration is one thing, but seeing ferns in gardens first hand is far superior.
Seek out local ornamental gardens, botanical gardens, and arboretums that have fern collections. The Hardy fern foundation in the US and the British Pteridological Society in the UK maintain lists of some of the best locations to visit.
Once there, take lots of photos, but also take time to study the design choices that the gardeners have made. Which varieties of fern work well together? What landscape structures make good back drops for the fronds? How can ferns be used to enhance parts of the garden that flowering plants would fail in?
And if you see particularly good ideas, steal them!
Ferneries, grottos and stumperies
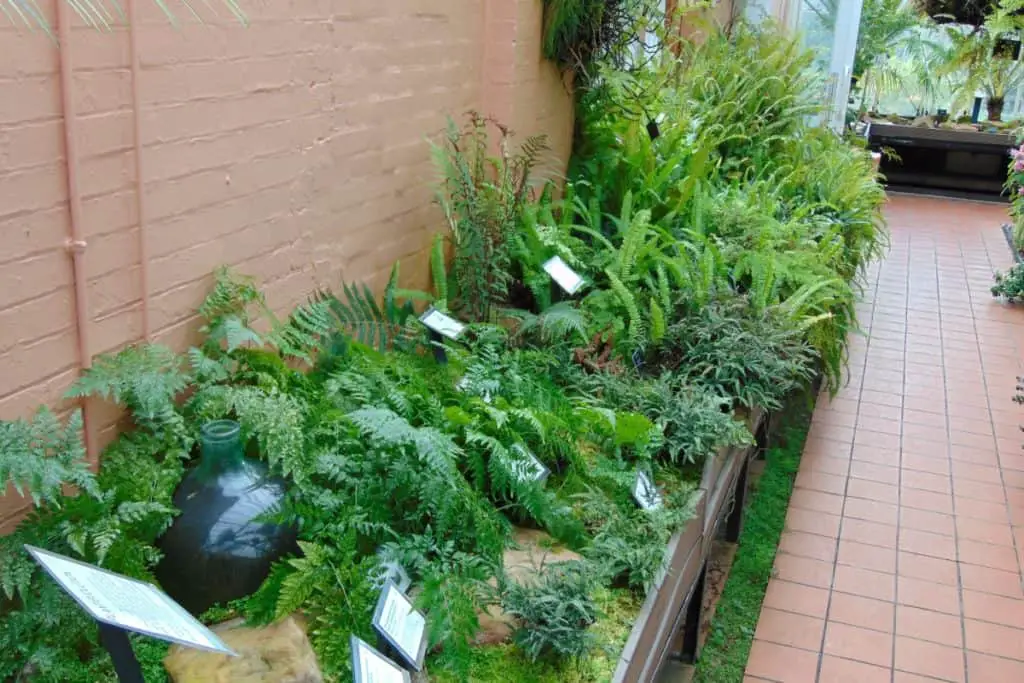
For a really deep dive, it is worth visiting specialist collections of ferns where they are used not just as a design element of a garden, but as the centerpiece. In the UK, some ferneries still remain from the days of the Victorian fern craze, and are perfect locations for finding exotic specimens, and a wide range of varieties all working together in an optimal design.
Grottoes are dingy, stony caves, often with springs or water, and planted with shade-loving plants and mosses. Often, they are artificial and were made as a vanity project as part of a larger garden. They frequently feature statues or sculpture, and of course are the perfect environment for ferns – especially epiphytic varieties that can cling to crevices and stony surfaces.
Stumperies feature weather-worn wood, logs and – as the name suggests – the dead stumps of old trees. They have an eerie quality, with living ferns standing in contrast to the sculptural dead wood, and have the feel of an ancient forest. Still, quiet, and with nothing but the gentle rustle of the delicate foliage of the ferns to animate the scene.
Botanical gardens can also yield riches, often having unique specimens and collections that span the full range of fern varieties.
Nature
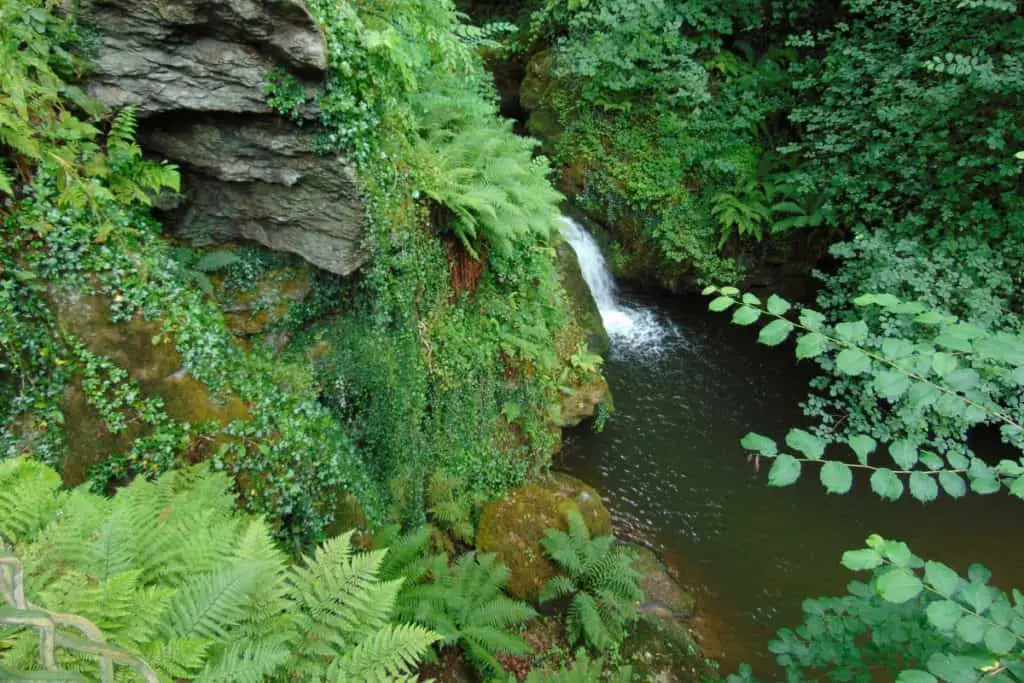
Finally, nothing beats the real thing: admiring ferns in their natural setting. Walks in the woods, and riverbanks and dells of the landscape are not just life-enriching, they can also provide important inspiration for design.
Ferns thrive naturally in woodlands, and in moist environments, and so look aesthetically satisfying beside wood and stone and stream. Part of the success of grottos and stumperies is the natural resonance that ferns have with those physical environments – we see them and they look “right”. The context is naturally pleasing.
If you can capture some of the magic in your own garden, it will enhance the mood of the space immeasurably. And the best way to succeed is to get out into the wild and drink in the beauty first hand.
3. Decide on the overall style
The next stage is to make some fundamental stylistic decisions. What will be the central theme of your design?
Fortunately, ferns are adaptable and look good in most contexts. A naturalistic approach is perhaps the most straightforward for a fernery, with an informal look, and plenty of stone and wood elements. This allows the garden to mimic the natural setting that ferns would be found in.
Water is another likely element. Ferns prefer moist soil and humid air, and so thrive near water – a pond or stream would be an excellent focal point in a fern garden.
This natural, informal approach is by no means the only option, though. Ferns also look good in more formal or modern settings.
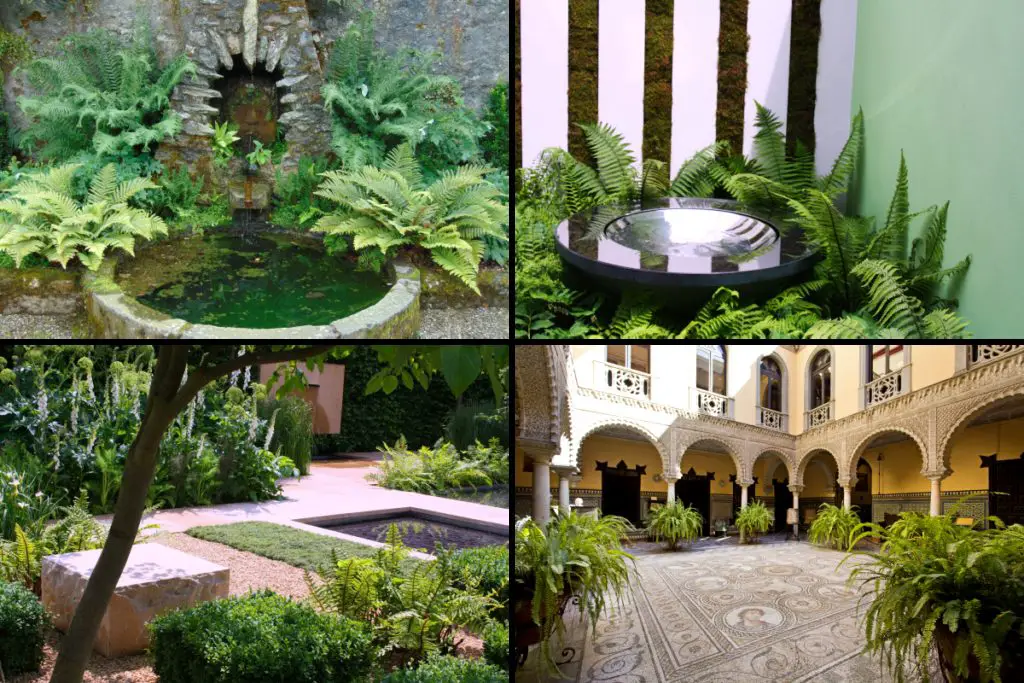
Straight borders, stone or gravel paths, paving and sculptures can all be complementary features to fern planting. Formal water features like paved rills or fountains, can also work beautifully when bordered with ferns.
Similarly, there is a lot of flexibility in the time and place which you wish to bring to mind with your final garden. You could opt for a traditional Victorian or Colonial style, a Mediterranean or Moorish style with tiled walls and courtyards, or a modern, minimalist design with living walls, outdoor rooms and wood paneling.
Ferns can work with anything. One of the great strengths of a plant with a subtle beauty that comes from its foliage is that it doesn’t clash with any design.
This flexibility is a strength, but it also means that you can have too much choice. While an eclectic combination of styles can also have its own charm if handled skillfully, it is a good strategic decision to opt for a consistent overall theme for your garden.
Once you have that central vision in place, you can begin to get more specific.
4. Decide on the hard landscaping
Once you have decided on an overall style, the next stage is to start with the hard landscaping. This means sketching out the borders, paths, decking, patios, pergolas, ponds, and so on, that form the immovable design elements of the space.
At this stage, you just need to make decisions about what you want to incorporate. The final layout can wait for the time being, but make those key decisions about the core structural features.
Do you want a seating area? What kind of water feature might you include? How big could your borders be, and should they be laid out in squares, rectangles, or more freestyle waves? What about the borders of the plot – fencing, hedging, walls? Do you want a cabin or sunhouse or outdoor rooms? What architectural elements or artistic touches will you include?
Spend some time on these big-picture questions and decide on what is possible. This stage is when you start to constrain your imagination and inspiration, and work out how the style you have settled on can fit within the physical limitations of the surveyed plot. How can you practically accommodate your dreams into the space you have?
Once you settle on the key elements you definitely want to include, you can move to a final design that will actually work in your space.
5. Design the plot
Now it is time to put everything together. Working from your survey of the plot in step 1, you can incorporate the hard landscaping elements into the space and find what’s possible.
This is where you lay out the beds, paths, seating areas, water features, and other hard landscaping elements that you decided you want as part of the design.
Keep in mind the physical constraints, the path of the sun, and the dimensions of the plot. Other important considerations are the lines of sight – what will you see when you enter the garden from the house or gate? Where will your paths lead your feet? Can you use landscaping features to create interest or intrigue, by showcasing or hiding key points of interest?
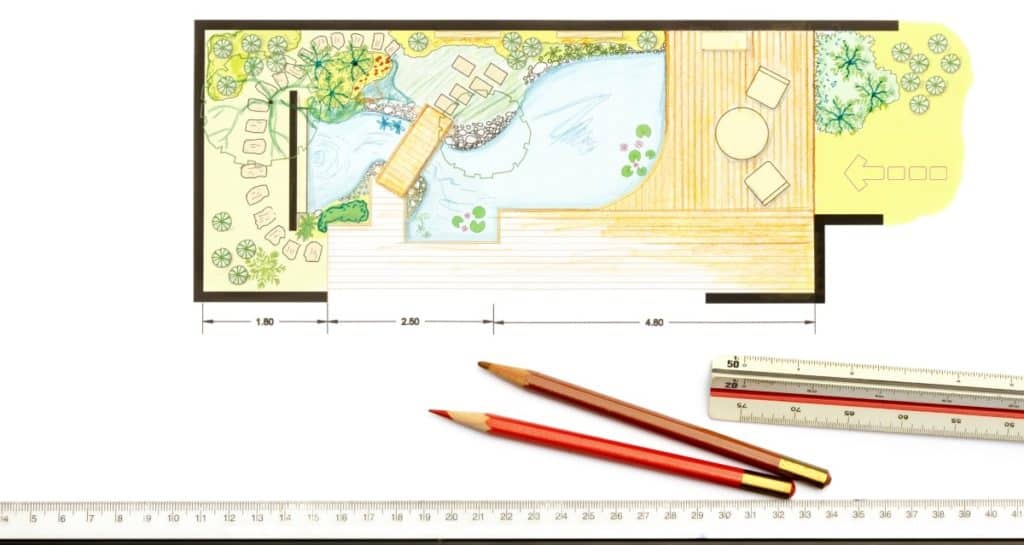
At this stage, nothing beats a pencil and paper for testing out ideas. If you are adept with design software then that is of course a great option, but printing out (or photocopying) several copies of the overall plot size and then scribbling out many possible designs is just as good.
For ferns, the location of beds, planters and pots is a critical limitation, as you have to prioritize the shade and shelter of the site. You can, of course, use landscaping to create shade if needed. For example, a cabin, pergola or trellised seating area could be used to block southerly sun and cast a welcome shadow.
Consider too the form and function of the final space. How regularly will you be out in the fern garden, enjoying it? Will it be a secluded corner, or a thoroughfare along the side of the house? Will you be able to water easily during dry spells? Is it a space you would want to use in the evening as well as during the day – and therefore do you need to consider lighting and power supply?
This design stage is all about taking the abstract ideas and turning them into a concrete reality. Capture your vision on the page, and then check that it all works, all makes sense, and is a practical plan.
6. Prepare the ground
Time to break ground. Once you have the hard landscaping laid out, your next goal is to plan the areas for planting.
In most cases, ferns will be planted directly into the ground, and so you will be partly constrained by your local soil. As a general rule, ferns grow best in well-draining soil that is acid to neutral pH. The ideal soil composition is a humus-rich loam with plenty of grit or other coarse material to prevent waterlogging.
However, while this general rule will suit a majority of fern species, it is by no means essential. There are beautiful, striking varieties of ferns that can grow in wet ground, in alkaline soil, and even on other plants or stone surfaces (the epiphytic ferns).
Regardless of your local soil composition, it is worth taking the time to prepare the ground where you will be planting up before you plant your ferns. Break up any heavy clumps or clay and dig the ground over, working in well rotted compost or manure if you have it, along with coarse grit or sand. Leaf mold or well-rotted bark is particularly good as a soil conditioner for ferns, as it reproduces the sort of mulch and humus experienced in a woodland environment.
If your design incorporates planters, containers, or pots, you have a lot more control over soil composition. A good potting mix can be made up to create the ideal conditions. One point to note is that ferns tend to have shallow roots, and so planters do not need much depth to sustain healthy plants. That gives some flexibility to add a base layer of gravel, stones or rubble to aid drainage without compromising on growth potential.
7. Select your ferns
Before planning your planting, it is worth taking the time to measure the pH of your soil, and also test your water supply if you are likely to use your hose for watering (rather than collected rain water). This will help guide your choices when it comes to fern selection as you can favor acid or alkaline loving species to suit your local geology.
By a similar principle, one reliable way to choose varieties that will thrive is to favor native species that are found naturally in your local climate. This obviously ensures they will be happy in your yard too.
When it comes to designing the planting scheme there are several key factors to consider: height and breadth of the mature plant, growth habit (creeping, spreading or crown-forming), whether the fern is evergreen or deciduous, and the pattern and coloration of the fronds. These factors will determine how the ferns work beside each other, but remember as always that the sun exposure of the plot will also be a limiting factor in species selection.
Within those constraints, the only other limit is your imagination. There are plenty to choose from. Some timeless design principles will apply – such as favoring odd numbers of each variety (although symmetrical pairs can work too), layering beds to draw the eye from low to high points or interest, and planting in drifts – but the final planting scheme is your own artistic expression. You can favor prettiness, sophistication, or wow-factor.
8. Finishing touches
A final thought is to be sure not to neglect the last touches that make a real impact. Choose garden furniture that match the overall design, rather than just using old wooden benches or chairs that you already have around the yard.
Consider using sculptures or other art as focal points of interest to draw the eye. Paint fences or decking in color blocks that add vibrancy or sophistication, rather than simply using plain brown stain.
Don’t forget lighting, which can be used to literally highlight key features in the garden design, and to alter the mood of seating areas on summer evenings.
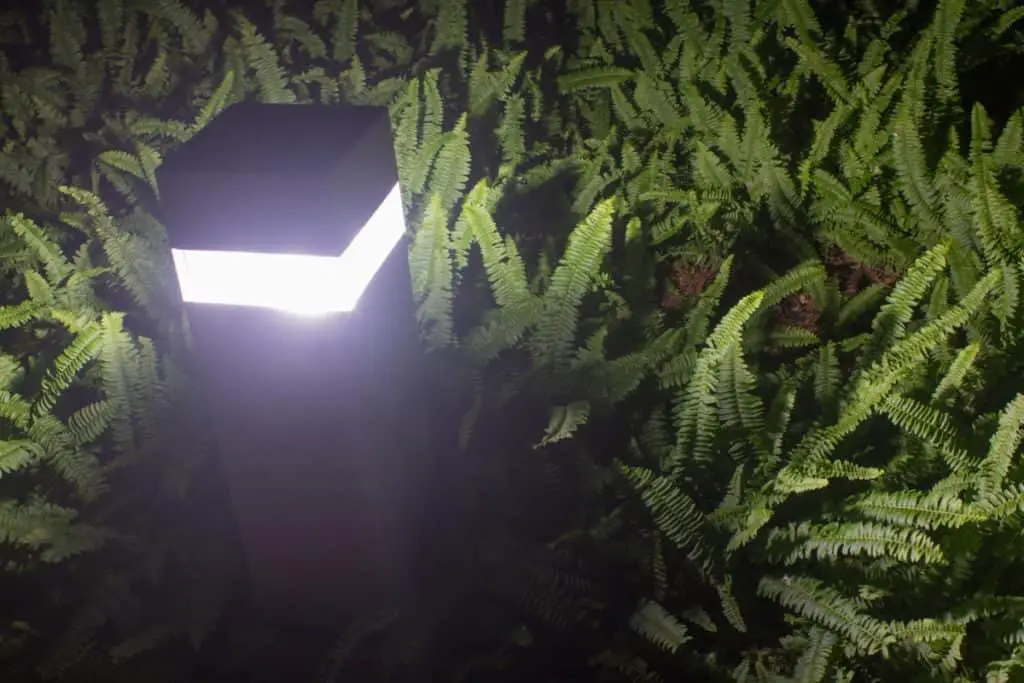
A few well chosen design flourishes can transform the impression that your fern garden makes. Sometimes it’s the little details that make the most impact.
Designing the perfect garden requires careful planning, creativity, open-mindedness, and the ability to translate dreams into reality. By following these eight key steps, you can transform the blank canvas of a yard into a stylish and inspiring fern garden that lift the spirits and showcase your imagination.